Showing posts with label Gift Items. Show all posts

Monday, January 23, 2012

Roxie Cards: Perfect for Valentine's Day

Valentine's Day is right around the corner.  The following cards were made using the December stamp of the month.  For those of you that didn't purchase the December stamp of the month I do happen to have a couple extra SOTM sets you can purchase.  So if you are interested in this Roxie Card kit complete with the December stamp of the month let me know.  I would love for you to make these fun cards and box for that someone special in your life.

Click on images to enlarge


Box top was inspired by courtney-lane.blogspot.com
 Thanks for stopping by.  If I can help you with anything let me know.  I always look forward to helping you create from the heart.

Monday, October 31, 2011

Halloween Craft: Candy Corn treat

Happy Halloween everyone. I can't believe it's already Halloween. I wanted to share a fun treat with you. No this is not a trick just a pure fun Halloween treat.

Last Thursday night was my monthly quilt club meeting. However, I was not able to attend this month because I was involved in my three day team retreat which was so much fun and I will be adding lots of artwork that we created at the treat in the next few weeks. Anyway, one of the quilt club ladies made these super cute Halloween treats for everyone.

Now how cute is this.  I guess next year I will have to make some of these, but for this year I am loving this one my friend made.  Hope you all have a wonderful Halloween and don't try too many tricks this year.  Check back soon for retreat artwork.  I am still unpacking my boxes.
Pin It

Friday, May 27, 2011

Block of the Month-FINISHED

Hello quilting friends.  It took me over a year to finish this project, but it was well worth the wait.  I have been very pleased how it turned out so I wanted to share it with you.


This is my 2010 block of the month quilt.  We completed one block a month in my awesome quilt club I attend every month.  It then took me a couple of months to get the center applique just the way I wanted.  Then I had to do my share of brainstorming to get the boarders just perfect.  In the end I was pleased how it all came together.


Click on any of the images to enlarge photo if desired.
 I believe I am going to put this one on the wall.  It matches my front formal room perfect.  Here are a few detail shots for those that want to peek.  Don't critique too hard I have only been quilting for a little over a year and I am still learning, but I love it and it's just the therapy I need.

Applique Oak Leaf.


Just a few of the blocks.  Thanks for stopping by.  It feels great to have this done.  Don't worry I have several others quilts in the works.  This is a very addicting hobby.

Long arm quilting was done by my friend Juli.  I am happy to hook you up with Juli if you should need any long arm quilting. 

Wednesday, May 18, 2011

Made From Scraps

I wanted to share something with you that my daughter and I made a couple of weeks ago.  However, first of all I wanted to thank all of you for your sweet thoughts concerning my daughter Alyssa.  I have had many emails and text checking up on her.  WOW I feel so blessed to have so many great friends and family.  She is moving around and the pain is under control.  We meet with the doctor next week for a follow up and hopefully he will give her some clearance to be able to start doing a few things like driving ect.   She is going crazy just watching TV, but she is doing well.

So speaking of Alyssa she has a good friend going on a two year mission for our church in one week.  She wanted to give him something special that was unique and fun.  So together we made this fun book for him.  I made the book and she was in charge of putting photos and journaling in the book.  She contacted five or six of David's good friends and his parents and had them each write a tribute to David and then she printed photos to coordinate with the tribute. 

It was a big hit and he was so impressed it brought him to tears.  The cool thing about the book is I really wanted to use the Lucky paper pack but all I had as far as Lucky paper was the left over scraps from this months workshop layouts.  Well believe it or not I had just enough scraps to make the book. 

So those of you that attended the Lucky workshop you should have enough scraps left over to put this fun book together.  I will post the Lucky layouts just as soon as things calm down at my house.  Sorry I have not had a minute to post those.


Cover. 
Remember to click on the images to enlarge if desired

page 1-2


page 3-4

page 5-6

page 7-8


page 9-10


Inside back cover
 Supply List (these items can be ordered on my website by clicking on the below links)

My Creations 3-Ring Binder
Lucky Paper Pack
Irresistibles Electric Alphabet
Suset ink
Lucky Level 2 assortment
Designer Buttons
Mocha Opaques

Adhesive, ribbon, hemp, chipboard frame (items I had in my stash of scrapbook supplies)

Thanks for stopping by.  If you have any questions concerning the project or anything else please let me know.

Tuesday, May 10, 2011

Create Your Custom Banner

I love making these banners.  They are perfect for just about any occasion and simple to make.  You start with a MY CREATIONS BANNER and paper pack that will work for your occasion a few accessories to decorate your banner and your favorite adhesive.  It's that SIMPLE.

Here is one I made for a friend to display at a wedding shower on the dessert table.
I used the X7134B Sweetheart paper pack, E1019 Bohemian Alphabet set, tulip ink to sponge around banner edges and some ribbon and various accessories I had in my stash.

These paper flowers are simple to make and you can make them all sizes.  If you don't know how to make them you can watch a video tutorial by a sister CTMH consultant by the name of Tracy Mason that is amazing at making these roses HERE  I learned how to make the roses from her.  Mine does not look anything like Tracy's because Tracy is the queen of these roses.  TRUST ME.

This banner was designed by my upline Karen.  We did this little project at a team meeting.  One side says "Spring" and the back side says "Summer"  I finally can hang the spring side up on my door.  It's so fun.

Thanks for stopping by.  If I can answer any quesitons for you  let me know.  All products can be ordered on my website at http://www.staminscrapexpress.myctmh.com/  Enjoy making your banners.

Tuesday, March 15, 2011

It's an Oldie

This frame sets on my counter in our office.  I had someone request that I send her photos of it so I thought I would just post for all of you to see.  I made this frame a couple years ago when I was asked to teach at convention for CTMH.


I started with a wooden frame that I picked up at a local craft store.  Put adhesive on the front of the frame.  Adhere the stripe B&T paper to the corners.  Then take B&T #2 and tear the corners.  Distress the torn corners with chocolate ink and adhere that to the frame.  I then distressed around the entire frame.

Then just add as many accessories as you choose.  This particular project I was asked to teach about the voice recorders that we use to carry.  So I had my kids record something they loved about there Mom.  It's something that I will always treasure and the best memory was watching my kids think of something they loved about mom.  It was hilarious.

This makes a great "Mother's Day" project and I promise your mom will love it.

Tuesday, February 22, 2011

Quilts for the Kids

I was talking to a dear friend yesterday and she reminded me that I never showed her the quilts I made for my kids for Christmas.  I guess with the holiday craziness I totally forgot to post.  Anyway, I got a wild hair before Christmas to make each of my kids a quilt to give to them on Christmas Eve.  Yes, we have that fun tradition to open something on Christmas Eve.  I was not sure if they would just roll there eyes or if they would think "Great here is another one of mom's hobbies"

I had to work fast and furious to get all four done.  I MADE it with the exception of Brandon.  His quilt was an embroidered football quilt that I was not able to get over to my quilter before Christmas, but the quilt top was done.  Sad thing I still have not taken it over to my quilter.  She has been in the middle of planning a wedding so I was pretty sure she didn't want to see the whites of my eyes.  So after this week I will get that over to her and will post when I get it back.

Well much to my surprise they loved the quilts.  I told my two college girls that they can just save them for when they have a home if they want, but nope they both took them back to college with them.  WOW they know how to make a mom feel good.


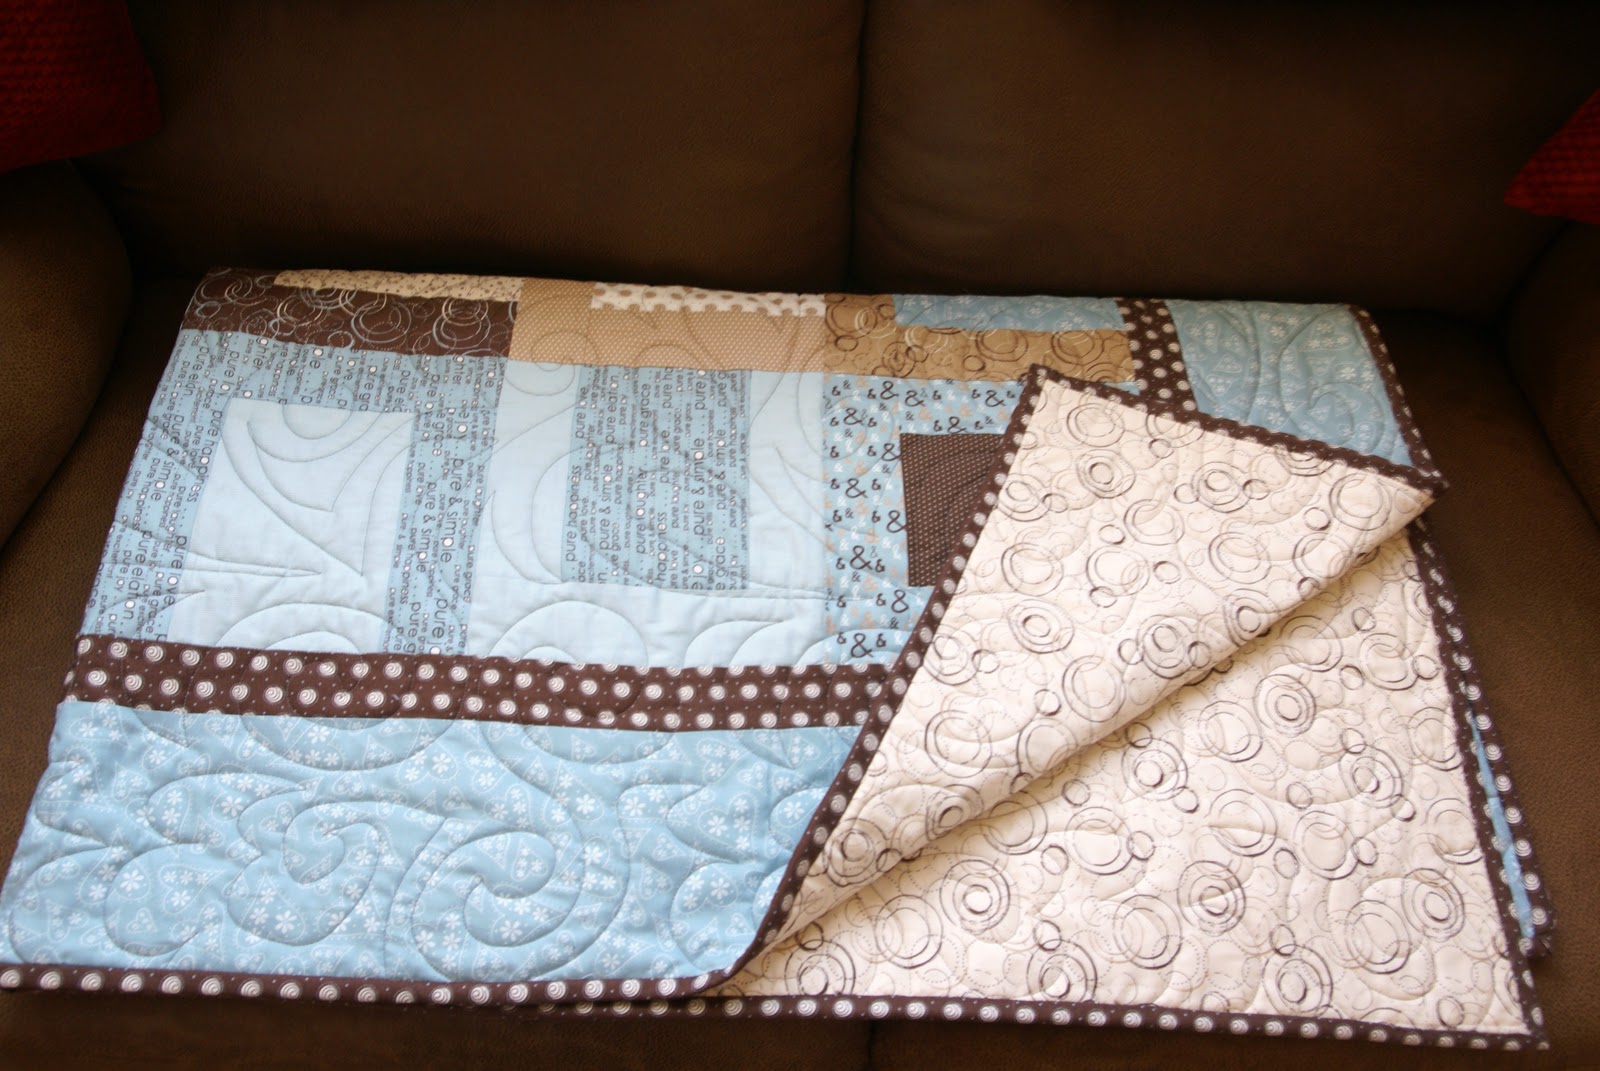
 This one I gave to Rachael.  The pattern I used is called "Fat Quarter Fun" from Country Threads.  I put minki on the back to make it super soft.  The back is my favorite.  It really shows the quilting.  It makes you want to just cuddle up and watch a great chick flick.

Alyssa's quilt was done using the pattern "Out of Time" by Crazy Old Ladies.  This quilt works up so fast.  I used a layered cake from Moda which made this super fast.  If you need to whip up a quilt in a day I suggest this pattern.


Lauren's quilt is a log cabin.  You can never go wrong with a log cabin pattern.  She loved the fun and spunky colors.  I scalloped the boarder and added rick rack around the binding.


Brandon's quilt I will post soon.  Hopefully it will look great when I get it back from my quilter.  Right now if I have to look at one more football I will scream.

Well it was very fun to do this for them.  HOWEVER, I think I might have gotten myself in a little deep because the kids are already asking me "Mom have you started our Christmas quilts yet for next year"  YIKES

Thursday, January 6, 2011

Recipe: Praline and Carmel Sauce

Those that have requested this recipe here it is-Enjoy!!!!!!

I decided to make something very simple this year for Christmas neighbor and friend gifts.  As I was digging through my recipe box looking for my poppy seed bread recipe I ran across this recipe that I forgot I had.  If you are like me you LOVE anything with carmel.  This carmel sauce is perfect on ice cream.  The beauty about this is that they are quick and simple and made in the microwave. YUM YUM

I gave our friends the carmel sauce and some vanilla ice cream.  I am glad you guys like the sauce and for those of you that just gave the ice cream to the kids and ate the sauce right out of the container you just made my day. 

1 1/4 cups chopped pecans
7 Tablespoons butter (divided)
1 1/2 cups brown sugar
3 Tablespoons flour
3/4 cup light corn syrup
2/3 cup evaporated milk

Place chopped pecans in microwave dish with 3 Tablespoons butter.  Cook for 3-4 minutes, stirring twice.  Watch the pecans closely.  You just want to roast them not burn them

In another microwave safe bowl place remaining butter and heat until melted.  Whisk in brown sugar, flour, and light corn syrup until blended.  Cook on high for 6 minutes, stirring twice, until the sugar is dissolved.

Add in 2/3 cup evaporated milk and the pecans, stir well

Pour into jars.  Keep sauce refrigerated and  reheat slightly in microwave to pour over ice cream. 

Makes 3 Cups.-YUM

Tuesday, January 4, 2011

Christmas Countdown: Final pages

Finally getting around to posting the final pages of the Christmas Countdown album.  WOW things got very hectic around our house before the holidays. 

If you didn't finish just keep working on yours and stamp more for gifts for next year.  You will be glad when the holidays come around next year and you have your albums all ready to give away as gifts.  I ordered several albums and plan to work on them a little every month.  Feel free to come work on your albums with me.


Saturday, December 18, 2010

Christmas Countdown: Page 8-5

Today is going to be busy so I better get moving along.   Here are the next set of four pages.  ENJOY!!!!!


Thursday, December 16, 2010

Christmas Countdown: Page 12-9

The countdown continues.  Keep working on your books.  It will all be worth it when you are finished.  Pages 12-9 are posted below.  Page 10 is my favorite page in the book.  Do you have a favorite page?  If so let me know.


Tuesday, December 14, 2010

Christmas Countdown: Page 16-13

Sorry for all of you that were expecting four more pages to be posted yesterday.  I worked at the hospital all day and I almost didn't make it inside the front door before I collapsed.  Very difficult day.  Remember to tell your doctors and nurses how much you appreciate them.  You probably have no idea what they actually go through in order to save your life.

OK now that I am done with my pity party lets see pages 19-16.  Keep working hard on your books they are turning out so amazing.


Sunday, December 12, 2010

Christmas Countdown: Page 20-17

How are you books coming along? Hope you are ready for the next set of pages. Below are pages 20-17


LinkWithin

Blog Widget by LinkWithin